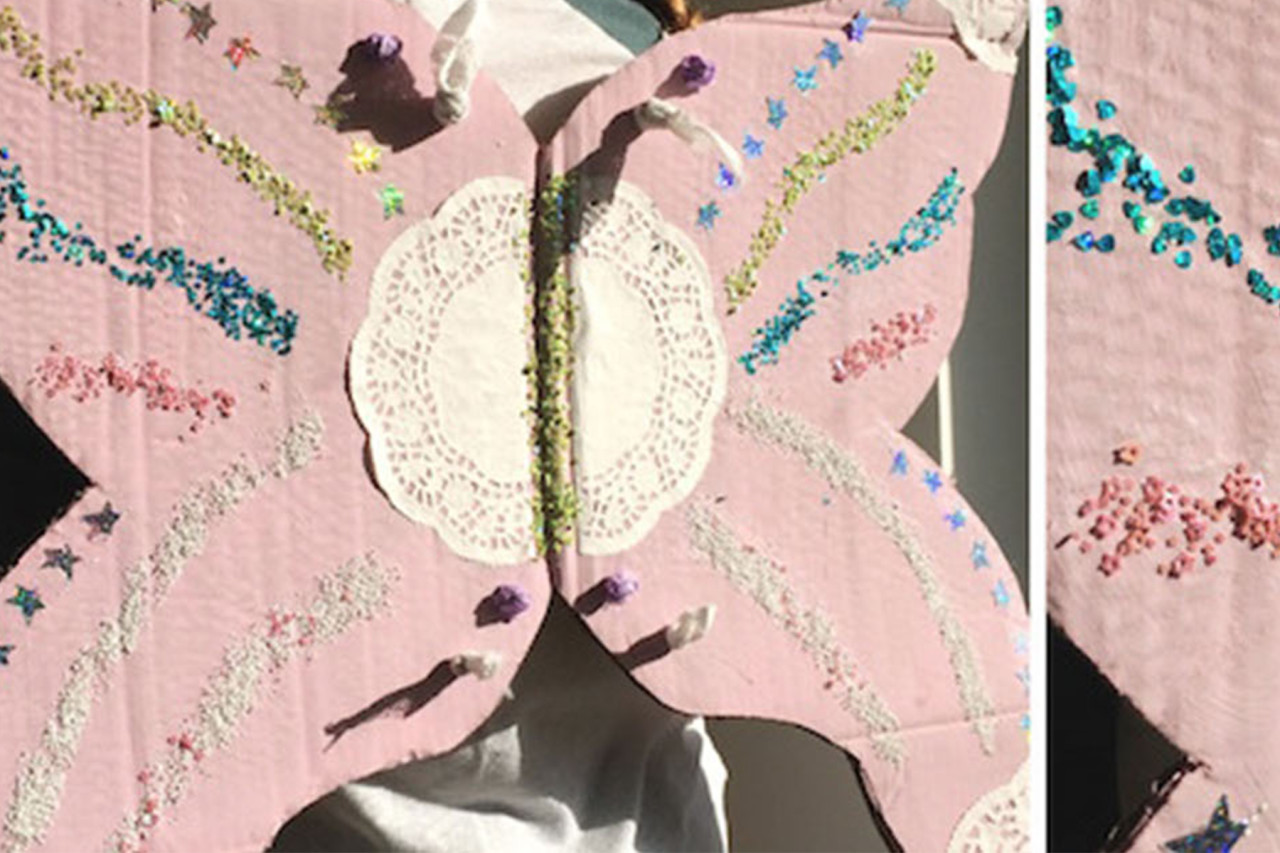
Kids love fairies – the magic, the glitter, the wings – why not let your child become a fairy for the day? With this fun and simple craft you can discover exactly how to make fairy wings for kids.
Using recycled cardboard and some craft materials, it's inexpensive and easy to make fairy wings. Your kids will also enjoy getting stuck in with the paint and glitter. And before we get started, don't forget to check out our stain removal tips for lots of advice on how to take care of any unwanted stains on clothes once you've made your fairy wings!
How to Make Fairy Wings: A Guide
You'll need:
Medium/large cardboard box
Scissors
A pencil
PVA Glue
Old net curtain ties or ribbon (preferably netted or sheer)
Glitter in various colours
Paint (let your child choose the colour they want their wings to be!)
Paintbrushes
Doilies
Tissue paper
Any other craft supplies you want to decorate the wings with
First things first, cover any surfaces with a wipe-clean tablecloth or old newspapers. Glitter can get everywhere, so it's much easier to cover your work area and carefully tip the leftover glitter on the tablecloth or newspaper into the bin, or back into the pot straight after. The vacuum cleaner will also come in handy.
Decide on how big you want your wings to be. It's best to hold the cardboard up against your child's back to visualise an accurate size. You can make fairy wings for all ages of children, so make sure your cardboard is big enough for your child's size and height. If you're making fairy wings for toddlers you won't need a very big piece of card at all.
Flatten your cardboard box so that you have two sides of the box free to draw the wings on with the natural join of the sides of the box as the middle of the wings. This will allow for the wings to bend. Draw the outline of one wing on one side of the join. Cut out your wing shape using scissors.
Important! Cutting cardboard can be tricky as it's often very rigid, so it's best that an adult does this part of the craft. Always take care when using scissors.
Fold the wing in on itself so it meets the other side of the cardboard where the bend is. Then, using this side of the wing as a template, draw around it onto the other side of the cardboard.
Now, cut out the other side of the wings following the pencil outline. Paint both the back and the front of the wings alternately, allowing for the paint to dry each time. You may need more than one coat per side to get an even coverage.
Now to make the arm straps for your fairy wings. Carefully pierce a hole at the top of either side of the joining of the wings using a pair of scissors. Again, an adult should do this bit. Then make two more holes at the bottom of the fairy wings in parallel with the two you just made. Measure the length of your old net curtain ties or ribbon to ensure they will fit around your child's arms when secured to the wings and then cut to size. Thread one tie or a piece of ribbon through one of the top holes and tie a neat knot on the front of the wings, thread through to the bottom hole and tie another knot to secure your arm strap. Repeat for the other side. Since the arm straps will be on full show when your child wears the wings, netted material or sheer ribbon make a pretty addition to the finished look. Now the real fun bit can begin. Let your child choose exactly how they want their fairy wings to look and use as much glitter as possible – after all every fairy needs some fairy dust. Here are some ideas to give you inspiration:
Stick doilies to your wings to create pretty edging
Use scrunched up tissue paper to create fun patterns
Create a sparkly rainbow with streams of different coloured glitters
Stick on sequins and shiny stairs to really make your fairy wings sparkle
Use glitter pens to create swirly designs
Pour some paint into a plastic container, mix in some glitter and ta-da, you've got some glittery paint! Once the decorating is done, leave the wings to dry, and then it's time for your little one to try them on.
Making fairy wings for kids really does open up lots of opportunities – a fun game of make-believe, a school play costume, an outfit for a fancy-dress party, or simply a great way to keep little hands busy on a rainy day.
How did you get on making fairy wings for kids? How did you decorate yours? Let us know in a comment below!
Visit the OMO messy play zone to get more DIY project ideas that your kids will love.


